
A long-awaited one: set up a recurring invoice that repeats at a set interval, and Sliptree generates the invoice every time, and sends it too if you want. It is a good way to put routine invoicing on autopilot and win back some time.
How do I make a recurring invoice?
Go to Invoices, then to the Recurring invoices tab, and click New Recurring Invoice. You can also turn an existing invoice into a recurring one: open the More actions menu on the invoice page and choose Make recurring.
Every recurring invoice has its own schedule
Under Details & schedule you set how often the invoice repeats, the Start date, and whether it Expires on a date, after a number of invoices, or never. For month-end billing there is a separate switch, Always generate on the last day of the month, so the invoice is generated on the last day of every month. That matters for February and March, for example.
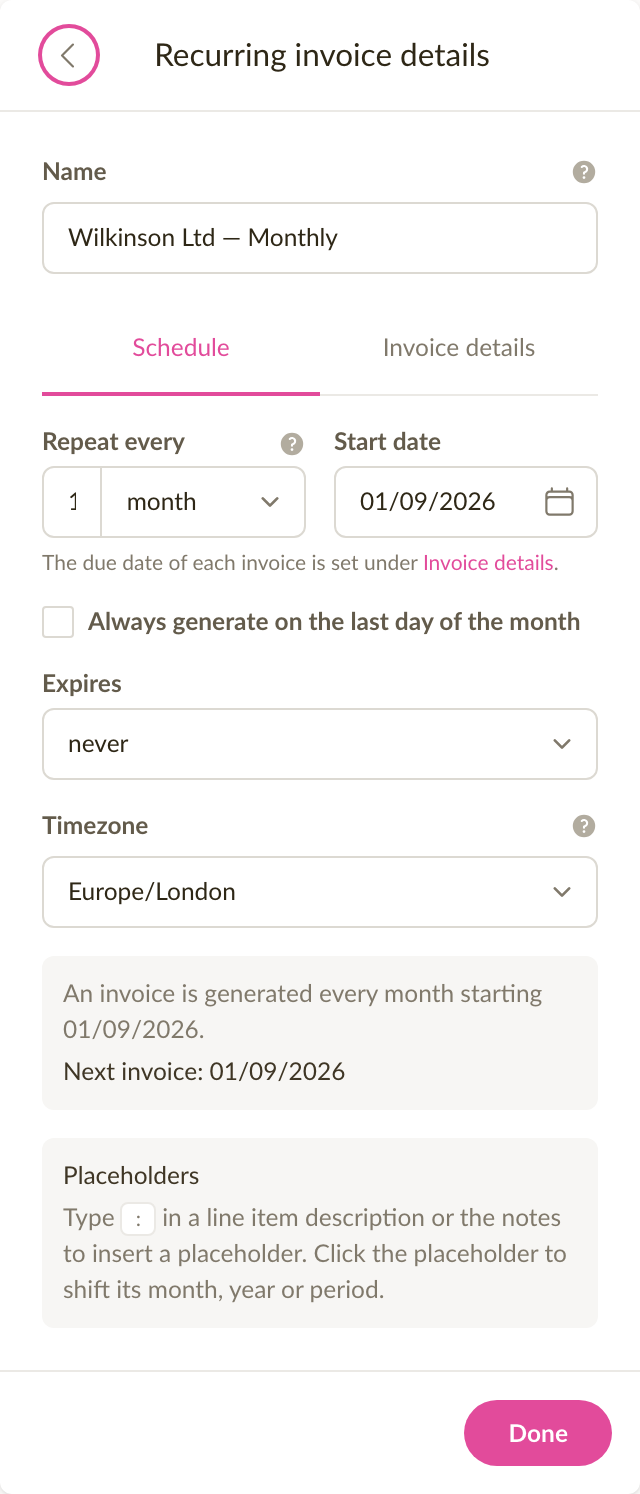
Each invoice is generated according to the schedule, in the recurring invoice's timezone, at around 8:00 in the morning. The recurring invoice's page always shows the date of the next one.
NB! A new recurring invoice starts out inactive and generates nothing until you click Activate.
A generated invoice can stay a draft or go straight to the customer
The Delivery tab has four choices under After an invoice is generated. With Save as draft the invoice waits for you to look it over and send it yourself, and with Save as completed it gets a number straight away. With Send via email it goes out with the email template and recipients you chose, and with Send as e-invoice it reaches the customer as an e-invoice, if the customer accepts them. Every generated invoice lands in your invoice list like any other, with a small mark next to its number that tells it apart. The list's Recurring invoice filter gathers the invoices of one recurring invoice together.
Placeholders put changing values on the invoice
The invoice probably has to name the period it covers. A rent invoice may need the month and the year, for example "August 2026". So that you do not type it on every invoice by hand, you can use placeholders.
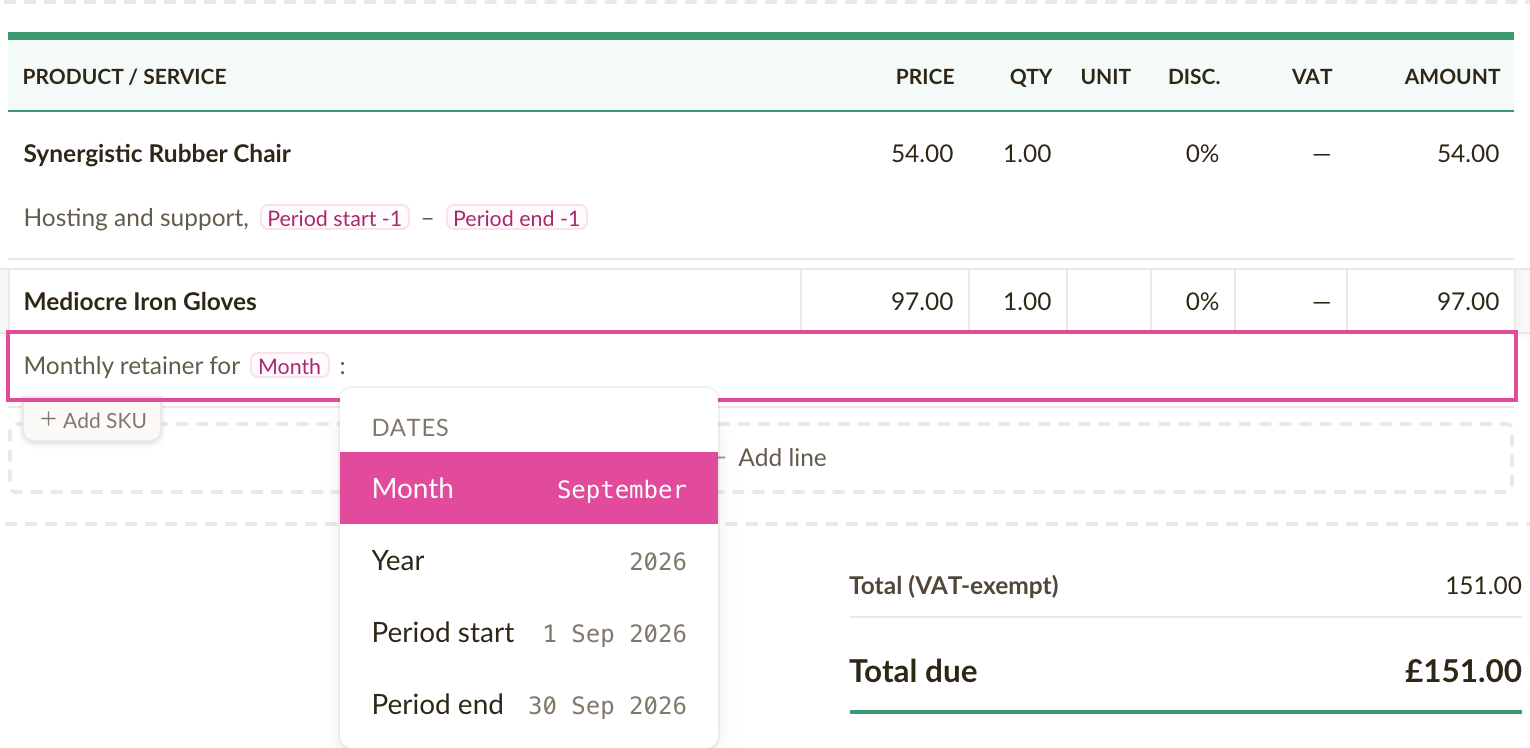
Type : (a colon) in a line item description or in the notes and pick Month, Year, Period start or Period end. The placeholder appears in the text as a clearly marked chip that shows the placeholder's name, and hovering it shows the value that will take its place on the next invoice.
Click a chip to move its period forward or back. You usually need that when you invoice in September for August. The Preview next invoice switch on the recurring invoice's page shows the document with every placeholder replaced by the value the next invoice will get.
A schedule can be paused, or an invoice generated right away
Generate now creates an invoice immediately and leaves the schedule alone. You may need it for a first test invoice or an extra one. Deactivate stops the schedule and Activate starts it again. Under every recurring invoice you can see each invoice generated so far and the whole history of that recurring invoice.

Note: the Free plan allows one active recurring invoice at a time; the Starter and Unlimited plans have no limit.
Fixes and improvements
- Searching the invoice list by customer or by line item is now noticeably faster, also for companies with thousands of invoices.
- When you pick a customer on an invoice, the business register lookup answers faster and offers matches from the third character.
- The totals of an invoice or estimate are now calculated faster, also on a phone and on documents with hundreds of line items.
- When a line item on an e-invoice had no name, a rather cryptic technical error used to appear. Now the message says clearly which line needs fixing.